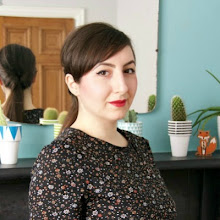
Hallelujah, I've finished my second Vintage Sewing Pattern Pledge make, so just three more to complete by the end of the year...pheeewwwww! I won't be bashful, instead I'll put it out there right now - I LOVE THIS DRESS! I'm a huge fan of back detail (cue my first #vintagepledge dress) and I'm finding slimmer fitting skirts really flattering at the moment.


Simplicity 5489 is a simple little pattern with three different back views to choose from and an A-line skirt, the perfect canvas for cool fabric prints if you will. Speaking of cool fabric prints, do you like mine? I was very generously sent this fabric by designer Frances Newcombe and it took me ages to pick Bon Voyage Noir as my favourite print from her gorgeous new Cherie collection. Frances's prints come in cotton lawns, knits and voiles, and I imagine they're all divine judging by the quality of my lawn. In case you can't wait to get your mitts on some in the UK, I've seen her collection over at M is for make. You're welcome ;o)


Like with most original vintage patterns, I had to make a lot of alterations to get this baby to fit. The bodice was drafted for very different proportions to my own (broad back / shoulders and a side boob), but as usual the waist fit just fine. I'll cover the alterations in a different post, but suffice it to say that I'm pretty happy with the fit I managed to achieve.


Onto the back detail...*swoon*! Simplicity 5489 is a relatively quick and easy make, but the bow took me forever! It's by no means perfect, but it's cute enough to be honest. It's one thing tying the perfect ribbon bow on a gift and quite another doing it with bulkier fabric. Next time I'll probably narrow it a tad...and practice tying bows in the meantime of course!


I hand stitched my bow to the left back opening and affixed a press stud / snap fastener to the other side.


My second favourite detail Simplicity 5489 has to offer is the skirt. I love how flattering an A-line shape can be, skimming the hips (aka muffin tops) without the bulky waist of a gathered skirt. This pattern offers the best of both worlds though, with gentle gathers either side of the centre front skirt. I think the reason I find slimmer skirts appealing is that I personally find them easier to dress down to fit in with my less-than-glamorous lifestyle.


The neckline and back are finished with a facing, but I skipped the armhole facings and opted to finish them with bias strips instead. Shock horror, I even lined the skirt! I'm usually too lazy and can get away with it for fuller skirts, but this shape would have clung to tights like no one's business.


Once again, I LOVE THIS DRESS!!!


Are those of you signed up to the Vintage Sewing Pattern Pledge panicking, like me, that there's only three months left? Check out my dedicated Pinterest board to get your butt in gear and do let me know if you've finished any new makes - hit me up on Twitter using #vintagepledge, leave a blog comment or email me. I want to share your #vintagepledge makes with the world!!!

About an age and a half ago, the lovely Jennifer Lauren generously sent me a copy of her Bronte Knit Top to try out. With a long queue of sewing commitments to work through, it took me longer than anticipated to get to Bronte, but I can happily say that she's well worth the wait!


What sets this T-shirt pattern aside is Jen's signature vintage twist - the back pattern piece sweeps over the front of the shoulders resulting in a 1940s style shrug sleeve. It's such a sweet detail, exposing enough of the collarbone without being as problematic to fit as a boat-neck. 


Bronte is one of those satisfyingly fast makes and can easily be sewn up without an overlocker. I just used my regular sewing machine and finished the neckline, sleeves and hem with my double needle. I managed to squeeze it out of just one metre of the most divine tropical floral print jersey from my stash and I'm feeling particularly smug about my stripe matching skills.


This pattern is so easy to work with that I really don't have much more to add about the construction. I can also assure you that despite its simplicity, Bronte is very well drafted with really clear instructions and an accurate sizing chart to boot. If you've never sewn with knits/jersey before don't panic! Jen's got you covered with a series of helpful tips and tutorials


Have you tried out Bronte yet? What are your thoughts on sewing with jersey?

You guys, I'm so excited to finally 'unveil' our finished dining room today! We've worked really hard to transform this room - overcoming some frustrating challenges along the way - and we're calling it a resounding success! For the curious among you I've documented how it all started, as well as listing the said challenges.


What's important to note about this room is that it's North-facing and rarely sees direct sunlight. With this in mind we wanted to strip back the previously oppressive decor and make it as light and airy as possible. On the other hand, we didn't want to end up with a stark and clinical room. We've joked that it looks a tad like a media conference/meeting room, but I think there are enough inviting features for this not to be entirely true.


Unlike with our mid-century living room, we went all out to 'finish' this one with all manner of accessories and wall art...although we're still searching for a cute cabinet or sideboard for the alcove on the right. Next on the agenda is to revisit the living room in terms of artwork, accessories and a cabinet/sideboard too. All in good time I guess...it's quite a costly thing this!


I love that I now have somewhere to proudly display my rather stunning, vintage (30s maybe) tea set. And I think my favourite feature of the room still has to be our revamped fireplace!


Overall it's a more contemporary aesthetic than I usually go for, but I think this room was crying out for it, so I'm pretty happy with the end result. What do you think?

Walls: Dulux Blossom White, Dulux Apple White

Floorboards: Dulux Trade Primer & Undercoat, Dulux Trade Diamond Matt Emulsion Paint (Pure Brilliant White), Polyvine Heavy Duty Floor Varnish (Satin Finish)

Rug & Canvas Print: Ikea

Table & Chairs: John Lewis

Light Fixtures: Lights World

Framed Wall Art: Juniqe

Cushions: Aldi

Can you believe that One Week, One Pattern 2014 (OWOP) has drawn to a close already? I had so much fun and enjoyed the many compliments I received from colleagues and friends, so thank you Handmade Jane for your brilliant hostessing skills!

OWOP confirmed what I already knew - that Colette Patterns' Hawthorn is an extremely versatile pattern. However, I am surprised that it seems to divide opinion so strongly. I really don't know why, because it was lust at first sight for me. I'm pretty pleased with all five of my versions and had no problems at all mixing and matching my way through the week. I'm not a huge skirt-wearer, but Hawthorn could easily be hacked into a skirt, meaning that you could get countless of outfits from this sweet little pattern!

Worn with Topshop dress and shoes 


Worn with asos jeans and sandals


Worn with Primark cardigan and sandals


Worn with Office shoes


Worn with Converse trainers


Worn with Topshop cropped jumper and Office shoes


Worn with asos jeans and Primark shoes


Did you take part in OWOP this year? How did you find?

My second and final make for OWOP 2014 (One Week, One Pattern) may be considered sacrilegious by some, because surely the collar is one of the sweetest things about the Hawthorn pattern?!? As much as I agree with that sentiment, I really wanted to try out a collarless version that would be easier to wear with cardigans. And guess what? I love it for its simplicity and versatility, aided by the pretty neckline and my gorgeous raspberry chambray.


I'm calling this dress a Hawthery (oooh, snazzy!), because I decided to replace Hawthorn's circle skirt with the gathered, A-line Emery skirt. This was pretty easy to do - the back skirt piece is cut on the fold and I cut two front skirt pieces after adding the Hawthorn button placket to the centre front. The placket was very nearly the right length as well!


As I said before, what keeps this dress from being boring is the lovely neckline detail. As I was feeling less lazy than usual I decided to further embellish it with one of my machine's decorative stitches and also went to town on the armholes and hem. Be warned that I may now be decoratively stitching pretty much everything I make...such fun!


One of my favourite things about the Emery skirt is how the pockets are 'hidden' within the side seam. You'd never know they were there, but for my own kicks I made them using some crazy fabric scraps I found in my stash.


So far, my absolute favourite way to wear my Hawthery is with this navy blue cardigan and shoes! Something about the combination of the raspberry and blue makes me so happy. Am I alone in thinking it looks like quite an 'expensive' combination?


All in all, I'm actually taken aback by how much I've loved making and wearing what is essentially, such a basic dress! Have you been pleasantly surprised by a recent make?

P.S. Chambray looks lovely, feels gorgeous and sews up beautifully. But boy does it delight in creasing and resisting the iron!!!

Eeeeep, happy OWOP (One Week, One Pattern) everyone! I'm attempting to get through the whole week wearing five versions of Colette Patterns' Hawthorn. Three of which you've already seen and two of which are brand new for the occasion. I won't be blogging each day, but I will be sharing my outfits daily on Twitter, with a round-up of them all at the end of the week.

I do have one of my new Hawthorns to show you today though, which was also my Day 1 outfit! I followed this nifty tutorial for making a cropped blouse and I really like it! I only wish I had washboard abs to wear it 'properly', but I'm loving it layered up for now.


I just about managed to squeeze this out of less than a yard of vintage fabric. I bought it ages ago on Etsy and was beginning to give up hope of finding something suitable to make with it due to the yardage. I'm so happy I managed it, the two are a match made in heaven. I even found the perfect vintage buttons for it in my stash. Don't you love it when everything comes together so effortlessly?


There's nothing really to say on fit and construction that I haven't already covered here or that the tutorial doesn't go into. What I can say though is that I particularly adore how this cropped Hawthorn blouse nips the waist in. It makes mine look seriously small (please ignore the junk in the trunk) and I can seriously get down with any clothing that does that.  


How are you getting on with OWOP so far?